
Help! My Knee Hurts in a Lunge
Help! My Knee Hurts in a Lunge

Knee discomfort - especially in the back knee - while doing a lunge is not uncommon for folks with tighter hips. There are many reasons you might be feeling some knee pain while in a lunging position: weak quads, tight quads, improper patella tracking, too much pressure on the patella, etc. Thankfully, there are several modifications you can try that can alleviate some of the pressure on your knee so that you can still stretch comfortably!
Modification #1: Cushion the Knee
The first modification I offer students is simply giving the knee a bit of cushion. Often the pain we feel is because we’re putting too much pressure on the knee cap into the floor, which is no fun for our knee! Adding a bit of squish to help distribute the weight/pressure can make your lunge more comfortable.
Common things you can use for some extra supportive squish are:

Rolled Up Yoga Mat
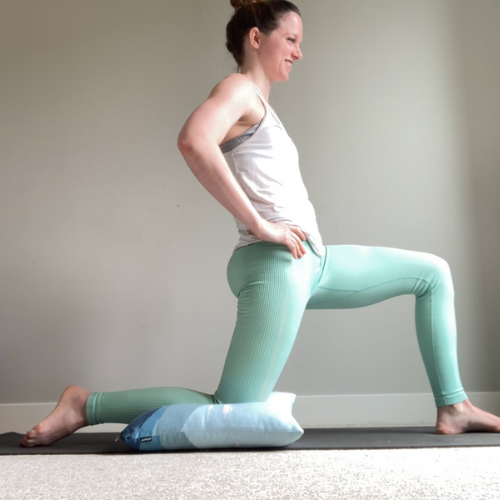
Pillow

Folded Up Towel
Modification #2: Lift the Knee
Similar to giving the knee cushion, we can remove any pressure into the floor altogether by lifting the back leg shin so the knee is no longer smooshing into the ground. A yoga block or two under your back shin is great for this! The closer you have your block to the knee (without placing it on your knee cap), the easier it’ll be to balance.
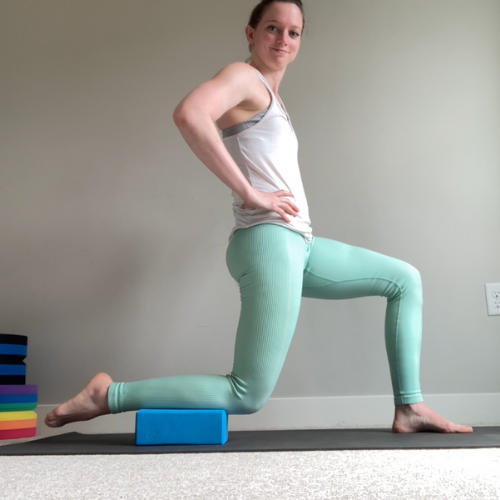
One Block - Place it the “long” way under your shin
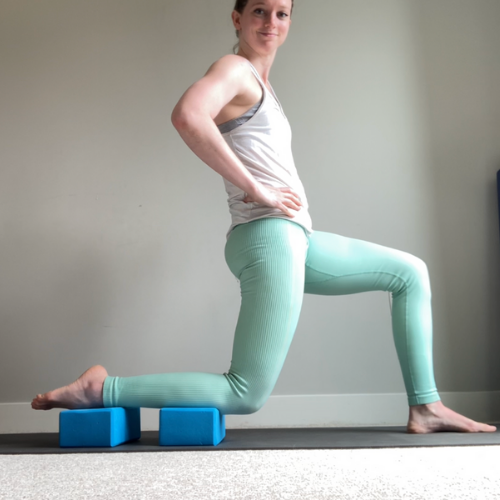
Two Blocks - I find this one easier to balance with some space between the blocks
Modification #3: Engage the Quads
If your knee pain is due to weak quads or improper patella tracking, adding a bit of quad engagement can help support the knee joint and reduce some of the knee pain. There are a couple of ways you can do this:

Knee Still On Floor - press your back foot into the ground to lightly engage your quads

Bent Knee Floating - tuck your toes to lift your knee off the floor. This is the most muscle-y variation, but a great way to strengthen your quads to support your knee over time!

Standing Lunge - A bit easier than keeping the knee bent, your quads still need to engage, but often this variation is easier to hold for a longer period of time
Modification #4: Shift Your Weight Forwards
This is less of a “modification” and more of a “form correction.” I saved it for last because not all students have the hip flexor flexibility to be able to get in a low/long enough lunge to make this adjustment.
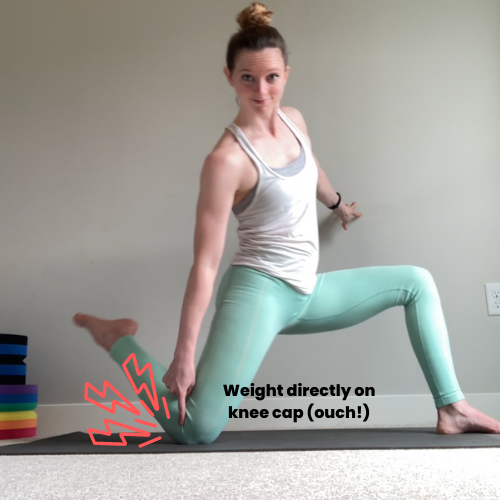
Instead of pushing all your weight straight down into your knee cap…
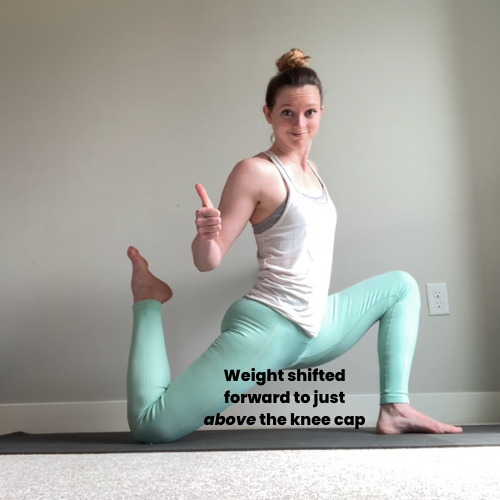
Shift your hips forwards so you can press your weight into the lower part of your thigh, just above your knee cap (note: this requires very flexible hip flexors!)
Long Term Solution*: Work Those Quads
It’s hard to make sweeping generalizations about what will make your knee pain in a lunge go away in the long-term without understanding the unique cause of your knee pain (hence the asterisk!). BUT often improving your quad flexibility and hip flexor flexibility to help you shift your weight forwards away from the knee cap (Modification #4 above), and improving your quad strength/engagement to keep the knee cap in a safe position will make your lunges much more comfortable over time.
Related Content
Recommended Class Recording

Who this class recording is for:
This 45-minute class is intended for anyone looking for a flexibility routine that helps cover their whole body in under one hour: hips (from multiple angles!), back, and shoulders.
Even if you are a super beginner and can’t touch your toes, this is a great class for you! In this class I was joined by my partner Nate (who you may recognize from the Can’t Touch Your Toes? 8 Beginner-Friendly Hamstring Stretches blog post). Nate is a great example of what a more “average” level of flexibility looks like, and helps show some modifications for students with stiffer bodies.
What this class includes:
A quick full-body warm-up to get you ready to stretch
Active flexibility exercises for hips, back, and shoulders (don’t worry newbies, there’s passive stretching in this too)
For beginners: mobility drills for hips and shoulders, stretches to work towards touching your toes, exercises and stretches to work on your hip and shoulder flexibility in multiple ranges of motion
For more intermediate students: stretches to prepare you for front splits, middle splits, and full-body backbending (that means shoulders too!)
Recommended props: Yoga blocks - totally optional, but they are a wonderful prop, especially if you’re a beginner. If you don’t have blocks, I recommend practicing next to a chair, your bed, or a wall so you can reach your hand out for balance if you need to.
Note: Because of Squarespace’s file size limitations (which is what I use for this wonderful website!), upon purchase you will receive a PDF with a link to the recording. You can either stream the recording online, or download to your phone or PC for a higher-quality viewing experience.