How to Get More Open Shoulders in a Bridge
How to Get More Open Shoulders in a Bridge
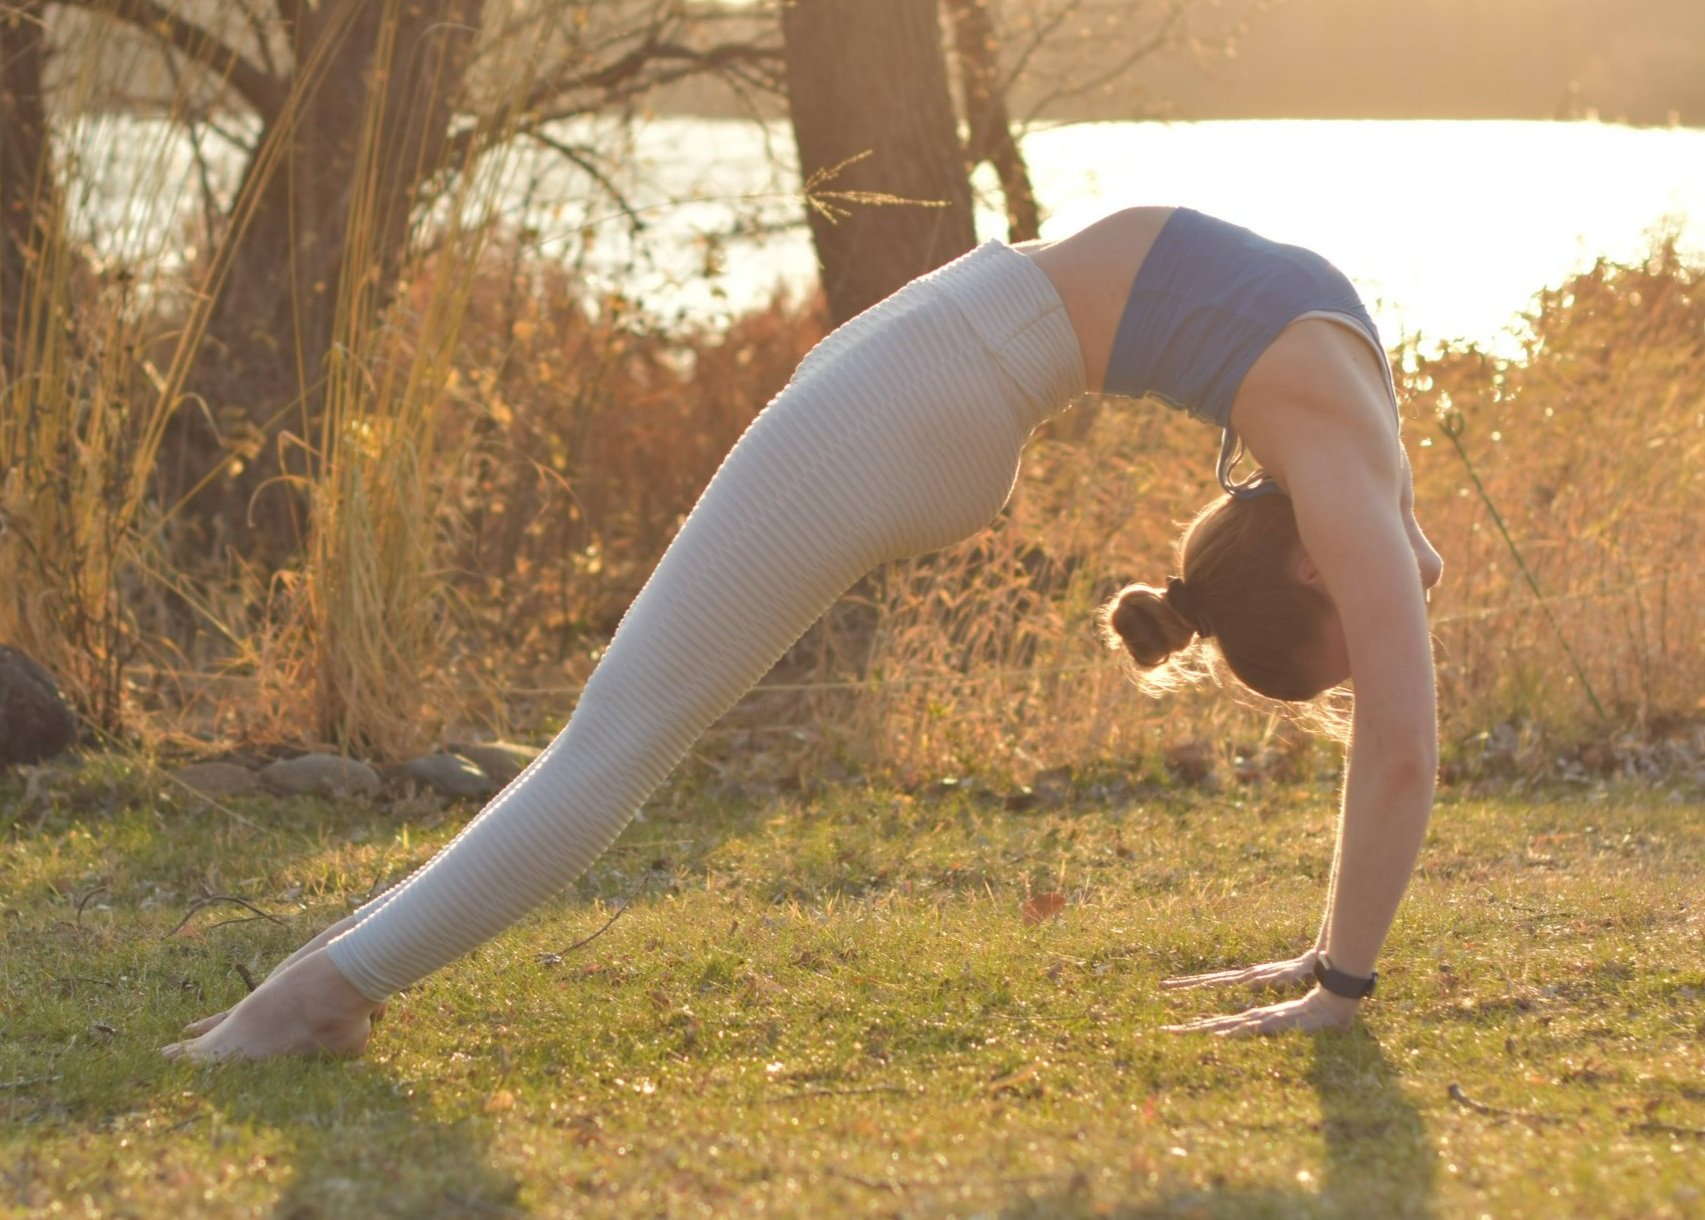
The coveted “shoulders over wrists” bridge!
If you feel like most of the bend in your bridge comes from your low back - you’re not alone! For the vast majority of the population, a bridge (or “full wheel” in yoga) is a low-back dominant pose, taking advantage of the natural curve of your lumbar spine. If your bendy aspirations are to even out your bend (and progress to deeper backbending poses), you’ll need to learn to recruit your shoulders and upper back. This blog post includes exercises for beginners and intermediate students working to try to stack their shoulders over their wrists in a bridge, as well as exercises for bendier students who want to take their shoulders even farther!
As always, before any kind of flexibility training you should start with 5-10 minute full-body warm up to get your blood flowing and your muscles ready to move. Then I’d recommend following this up with a shoulder-specific warm-up, and shoulder-specific conditioning since that’s the area you’ll be spending a bit more focus on.
Shoulder External Rotation Conditioning
“External shoulder rotation” is so important for backbending, I wrote a whole blog post about it. This especially applies to bridges because we need to have our shoulders externally rotated to safely support our bodyweight in our shoulders without pinching any nerves and to access the greatest amount of shoulder flexibility.
I won’t go into a ton of detail on those exercises here since I’ve written about them before in that older blog post. But if you only have time for ONE exercise, my personal favorite is the Block Sandwich Lifts:
Moose Stretch Variations (aka “Getting Arrested”)
I like variations of the “moose” or “getting arrested” stretch as nice passive shoulder openers, especially doing them before more active drills like hitchhikers. Alternatively, you could do these later in your practice if your goal was to see how deep/low into the stretch you can sink once you’re really warmed up.
“Getting Arrested” Stretch (Beginner Friendly)
Start an arms-distance away from the wall, facing the wall
Reach both arms straight up overhead, placing your hands shoulder-width apart on the wall
Tuck your tailbone to prevent your low back from arching (aka tilt your pelvis backwards) and start to lean your chest and armpits towards the wall. Hug the outsides of your armpits towards the wall so you feel a stretch in your lats (you may also feel a stretch between your shoulder blades)
Hold this stretch for 10-30 seconds
Then let your low back arch by lifting your tailbone away from the floor (tilting the top of your pelvis forwards). If this feels easier, you can lean your chest more in towards the wall, or slide your hands and chest down the wall for a deeper stretch. Hold this for another 10-30 seconds
Note: for very backbend-y people, if it feels easy to get your chest to touch the wall, you can deepen the stretch by either:
sliding your hands/arms/chest down the wall
placing yoga blocks between your hands and the wall
Arm Lift Variations (aka “Hitchhikers”)
Variations of active arm lifts help focus on active shoulder flexibility for shoulder flexion - reaching your arms overhead, which is precisely what we need to get deeper into your shoulders in our bridge! I like doing a variation of double-arm movements (both shoulders working together) and single arm movements where you focus on one shoulder at a time.
Block “Hitchhikers” (Beginner-Friendly: Back to the Wall)
Start holding a yoga block on the widest width between both your arms
Lean your back into the wall so that your butt, ribs, shoulder, and head are all pressing into the wall
Reach your arms (still holding your block) as far overhead as you can while still keeping the back of your shoulders and ribs pressing into the wall (no arching through your back!). Wrap the outside of your armpits towards the front of your chest
Slowly pulse your arms towards the wall 10 -15 times, making sure to keep your arms straight and the outside of your armpits pointing forwards the whole time (don’t let them splay out to the sides)
Block “Hitchhikers” (Intermediate: Belly to the Wall)
Start holding a yoga block overhead on the “wide” setting between both of your hands
Press your belly and chest to the wall while still holding your block overhead
Wrap the outsides of your armpits towards the wall
Keeping a neutral spine, arms straight, and maintaining your external shoulder rotation (shoulder blades and outside of your armpits wrapped toward the wall), slowly pulse your arms backwards 10-15 times
Need to make them easier? Turn around so your back is leaning into the wall
Want to make them harder? Bend your elbows 90 degrees and squeeze your elbows together as you try to pull your elbows away from the wall (don’t let the elbows flare out wider than shoulder-width apart!)
Child’s Pose Arm Lifts (Beginner Friendly)
Start sitting in a comfortable child’s pose with both arms reaching forwards, hands shoulder-width apart (feel free to prop your hips up on blocks or a blanket if that’s more comfortable)
Make a “thumbs up” sign with your right hand, thumb pointing towards the ceiling (this is going to help keep our shoulder externally rotated)
Press your left palm into the floor. Keeping your right arm straight, and your chest and armpit facing the floor (no twisting!) slowly lift and lower your right arm 10 times.
Once you’ve done 10 on your right arm, switch to your left
Need to make them easier? Slide your hands a little closer toward your knees and pull your chest away from your thighs
Want to make them harder? Try an arm lift variation that includes a bit of a backbend, like low cobra arm lifts or high cobra arm lifts.
Puppy Pose Arm Lifts (Advanced)
Note: this is an advanced drill only recommended for students who can already comfortably get their chin or chest to the ground in a normal Puppy Pose (aka not a beginner-friendly drill - for folks who have more average flexibility, there are plenty of other exercises in this blog post to do instead!)
Start in a deep puppy pose (hands shoulder-width apart, arms straight, shoulders externally rotated, tailbone lifted)
Make a “thumbs up” sign with your right hands, thumb pointed up towards the ceiling'
Press into your left hand for support. Keeping your chest square to the floor, slowly lift your right arm as high as you can without twisting your torso or letting the armpit flare out to the side
Repeat for 10 arm lifts total, then switch arms
Puppy Pose Variations
This is another topic I’ve written about before so I won’t go into a lot of detail in this post. If you’re looking to open your shoulders more, variations of Puppy Pose are great because they help work on your shoulder flexion (overhead reach) while you’re maintaining external shoulder rotation.
Depending on your current flexibility level, you could do some passive variations of puppy pose to relax into the stretch, or if you’re somewhere on the bendier end of the spectrum you could do more active versions of puppy pose where you engage your shoulder and chest muscles while they’re in the stretch.
Related Blog Post: 5 Puppy Pose Variations for Open Shoulders
For Contortion Students: Shoulder-y Bridge Variations
For students who already have a comfortable straight-arm bridge (with no wrist, shoulder, or back pain) and an understanding of proper engagement for contortion-style backbending, a straight leg or “rainbow” bridge is a fun bridge variation to go deeper into the shoulders.
Rainbow Bridge (Intermediate/Advanced)
Push up into your “regular” bridge
Walk feet farther away from your hands
Push into your feet to straighten your legs for a moment, then relax and let your knees bend
Rock back and forth gently a couple of times, straightening your legs, then bending
If it feels comfortable keeping your legs straight, hold your straight legged bridge for a couple of breaths
Want to make it harder? Bring the insides of your feet together to touch and/or walk your feet in a little bit closer to your hands (a small adjustment goes a long way, so I suggest only sliding your feet in one inch at a time!)
Looking for a Full Stretching Routine?
I have a full 60-minute recorded workshop, Bridge Clinic: Hello Upper Back! available for purchase if you’re looking for a stretching routine that caters to shoulder (and upper back, as the name suggests :) ) flexibility for bridges. The recording includes a warm up, mobility and conditioning work, and lots of active flexibility exercises to help even out the bend in your bridge.


