
Struggling to Keep Your Back “Flat” in a Forward Fold? 5 Tips to Hinge at the Hips
Struggling to Keep Your Back “Flat” in a Forward Fold?
5 Tips to Hinge at the Hips
Earlier this week I wrote about why you may choose to keep your back flat (instead of letting it round) in a forward fold - but for many students that’s easier said than done! Like I’ve mentioned in previous posts, our body is really good at avoiding a challenging stretch and compensating by moving other joints. So when it comes to forward folds (or hamstring stretches in general), when our hamstrings are tight, our body typically tries to shift the work to an easier-to-move joint: the spine.
Here are a couple of tips to help train our back to stay flat (and not steal the show) when trying to work on our hamstring flexibility:
Tip #1: Bend Your Knees!
This is the easiest, immediate “fix” you can do to make it easier to flatten your back (and more easily tilt your hips forwards to stretch your hamstrings): bend your knees, possibly kind of a lot.
Here’s what that looks like in Nate’s body:
When Nate keeps his legs straight, he really can’t forward fold very far before he starts to verge into “this feels painful and no long productive” territory, or compensate his posture by rounding his back
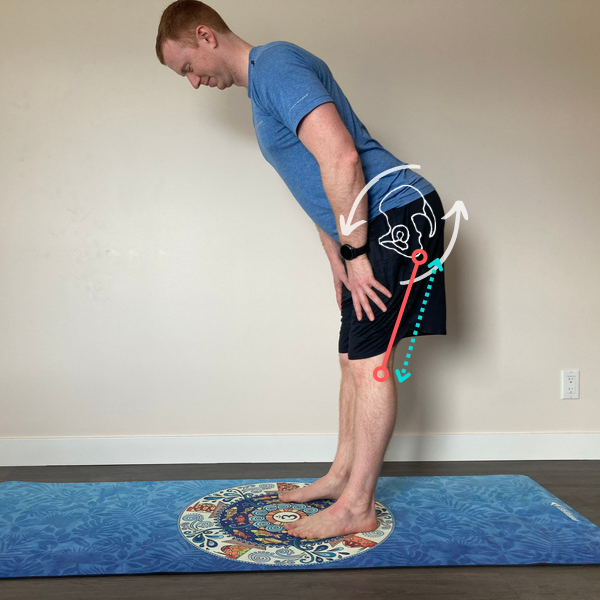
When Nate bends his knees, this allows him to tilt his hips farther forwards so that he can more easily rest his hands on his thighs and feel a safer hamstring stretch without straining his back

That means “your” version of a particular stretch might look very different from what you imagine in your head based off of a photo you found online. Here are two other examples of what a generous knee bend might look like in two other common hamstring stretches:
Downward Facing Dog

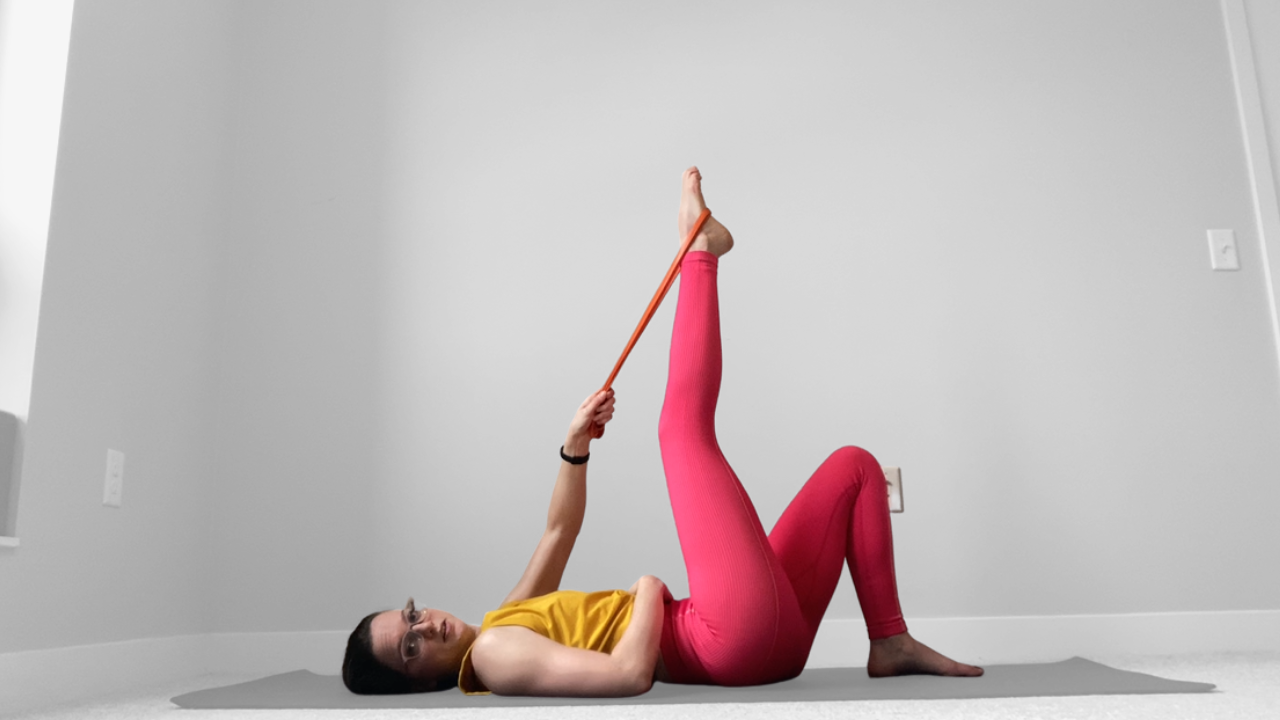
Supine Hamstring Stretch
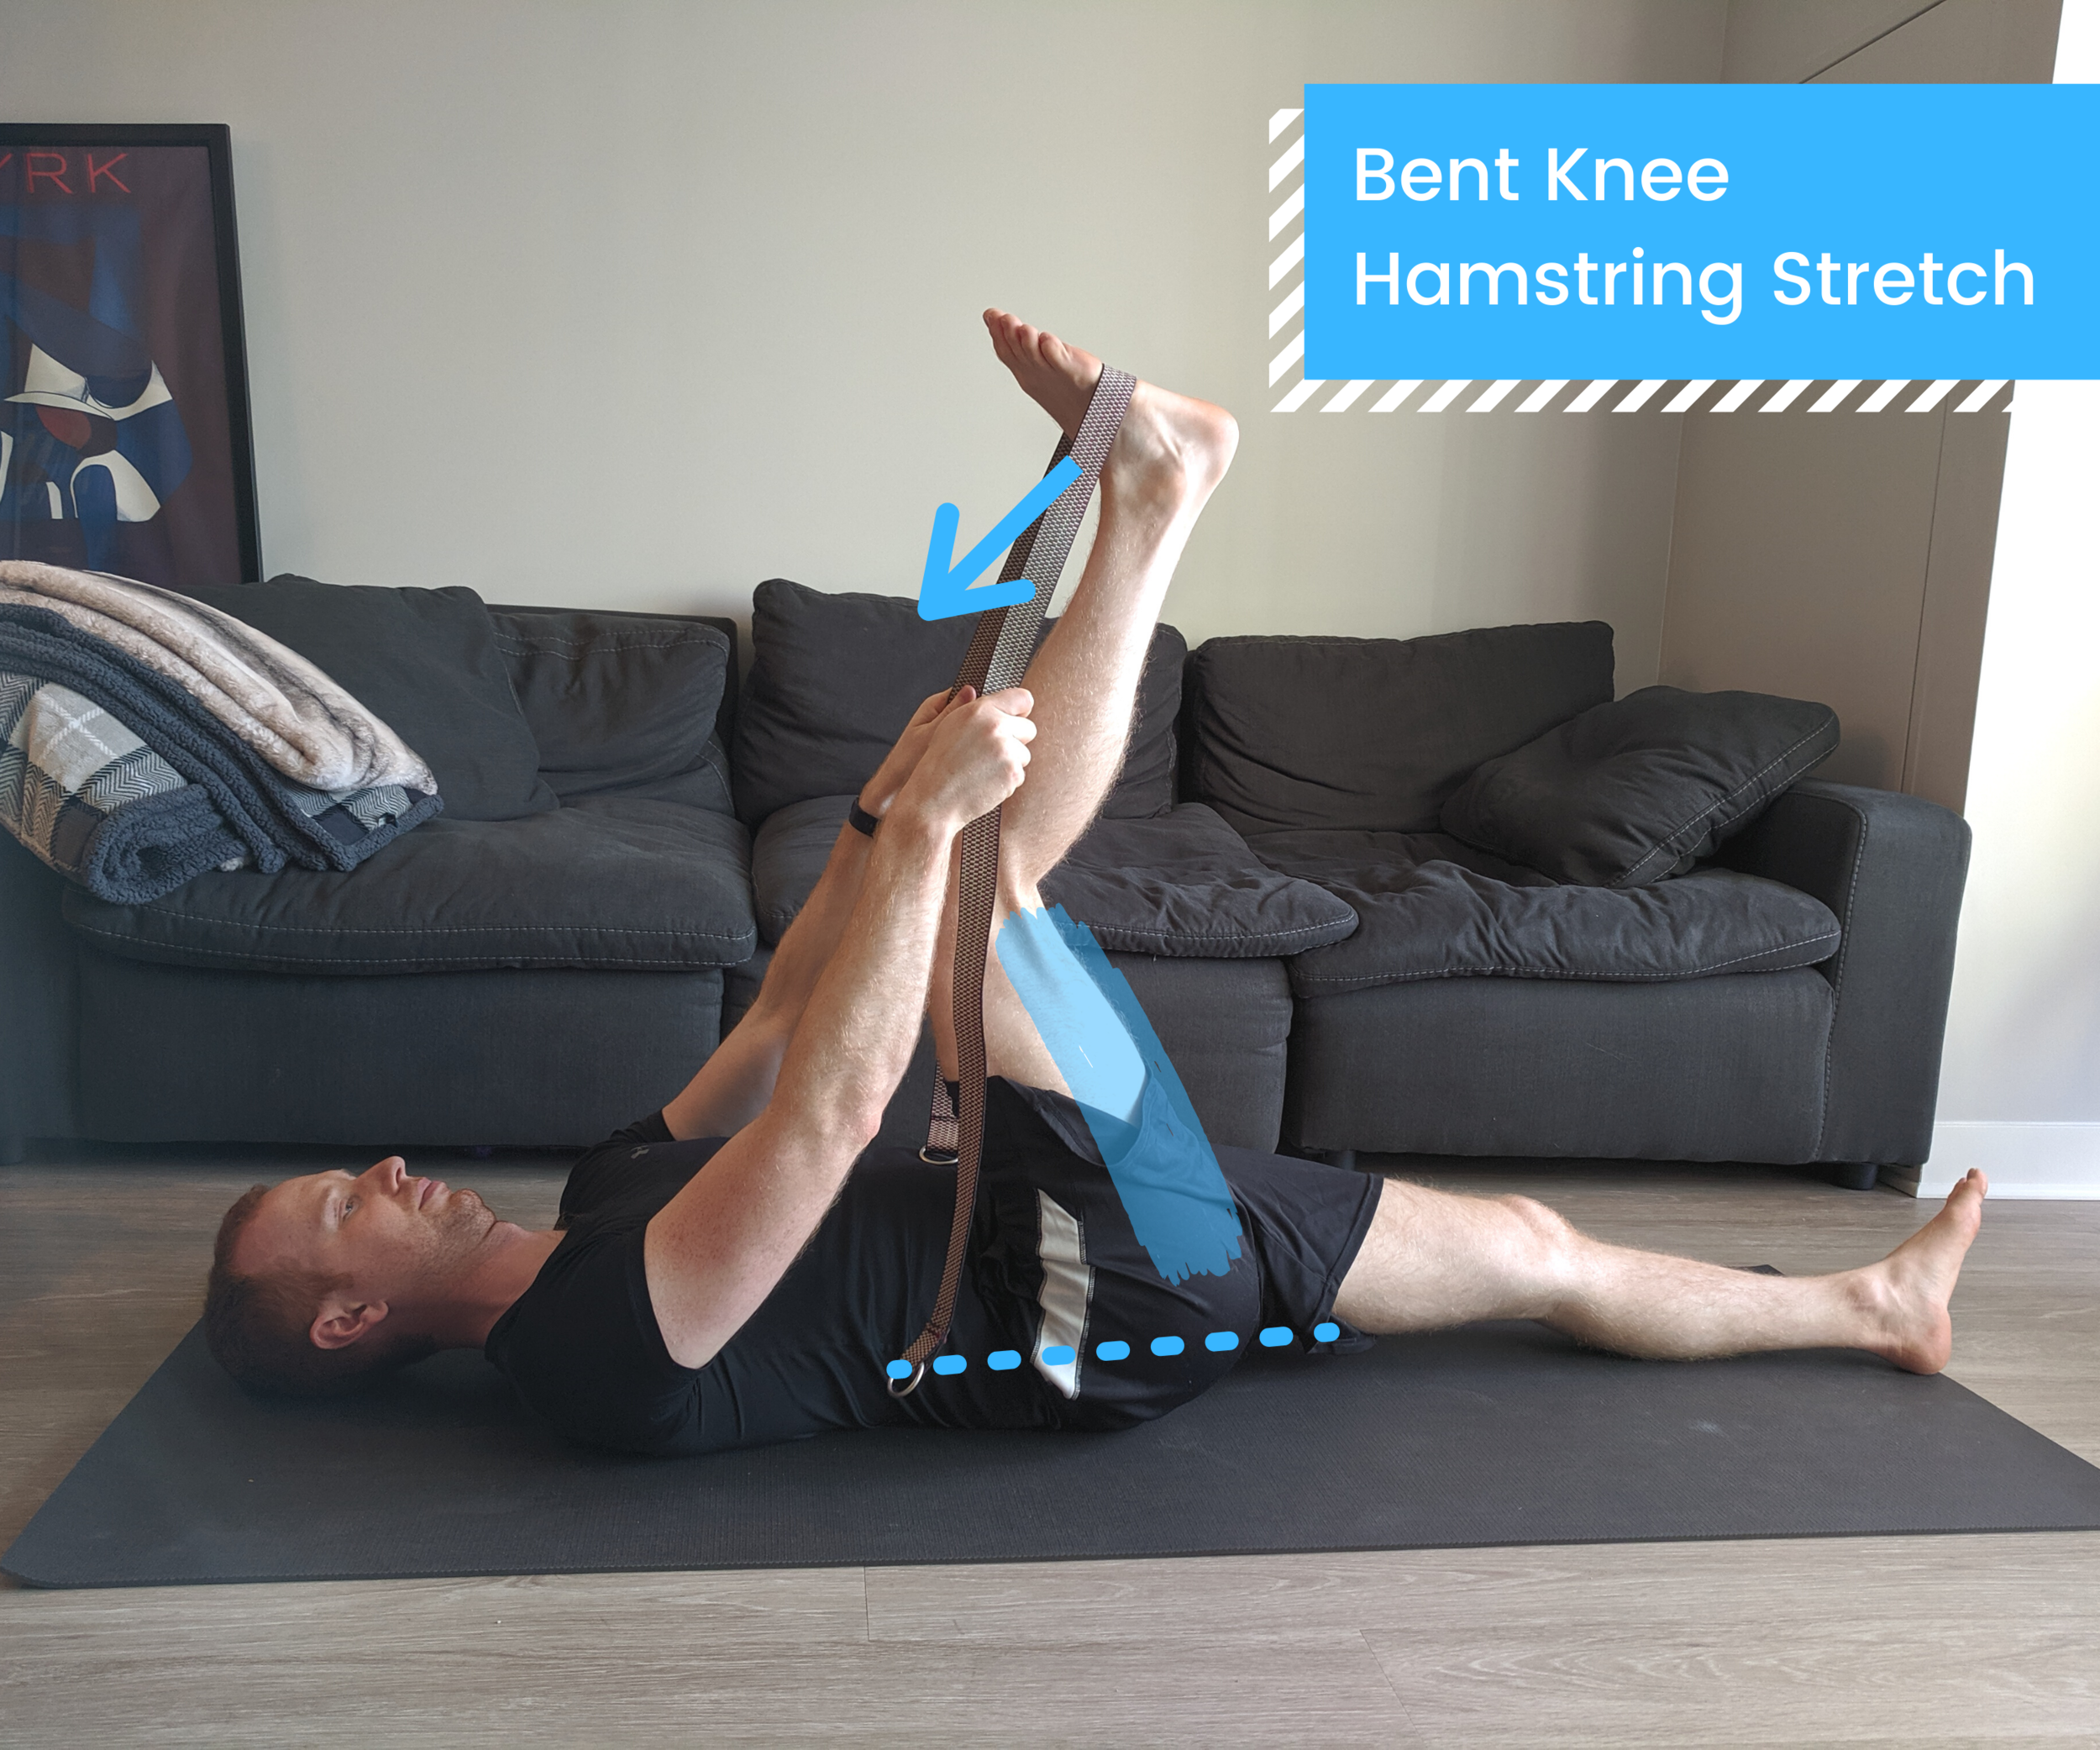
Don’t worry about how much you need to bend your knees to flatten your back - if your goal is to prioritize the hamstring stretch and learn to stretch your hips without your back getting involved, that’s likely going to involve bending your knees.
Tip #2: Strengthen Your Erectors (Back Muscles)
Aside from simple body awareness and not realizing how much our back is rounding, one reason it can feel so challenging to keep our back flat in a standing forward fold is because our erectors, the back muscles that help us arch (or resist rounding) our back, are weak.
Back extensions are one of my favorite exercises for strengthening this range of motion:
P.S. Don’t worry if your back extensions are way smaller than the ones I show in that video - I am a contortionist so I have very strong/flexy back extensions! (Another great example of why you can’t compare what you look like to random photos/videos you find online…)
Tip #3: Strengthen Your Hip Flexors
This is specifically a tip for folks who struggle to keep their back flat in seated forward folds. If you find you can keep a flat back when standing (when gravity is helping you lean forwards), but as soon as you try a seated forward fold you can’t seem to keep it from rounding (where gravity is no longer really helping you lean), that’s likely due to weak hip flexors. The hip flexors are the muscles on the front of your hip that help you lift a leg towards your chest, or - when seated - rotate your hips (and torso) towards your thighs.
This Instagram post goes into more detail:
Working on your hip flexor strength with drills like these will help:


Tip #4: Use a Physical Prop to Learn “Flat”
I know this one feels goofy - but it works! If you really struggle with realizing when your back is rounding (poor proprioception), using a physical object as a reminder can be a big help.
Grab some kind of a long sturdy dowl-shaped object, like a broom. Stand up straight and hold the broom against your back, feeling contact in 3 points: back of your head, your upper back, your sacrum (back of your pelvis, between your hip bones). Try to forward fold. If any point you lose any of the three contact points, that means you’re rounding your back!

Correct - broom maintaining contact in all 3 spots

Incorrect - broom loosing contact with one area (rounding through the upper back)
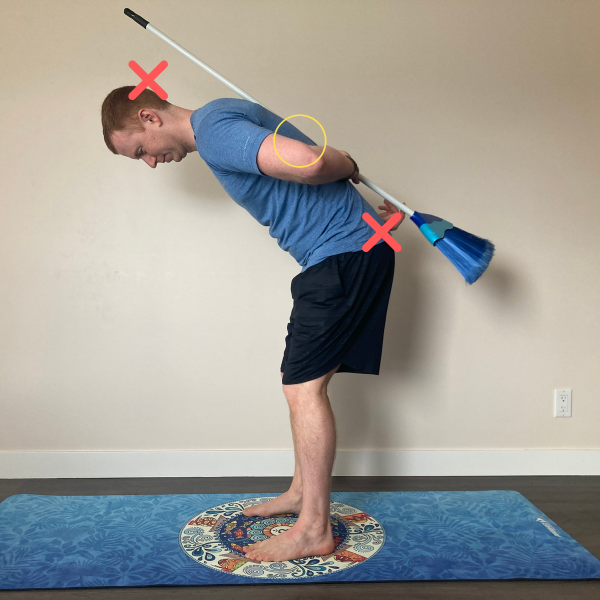
Incorrect - broom loosing contact with two areas (rounding through the upper and lower back - very common!)
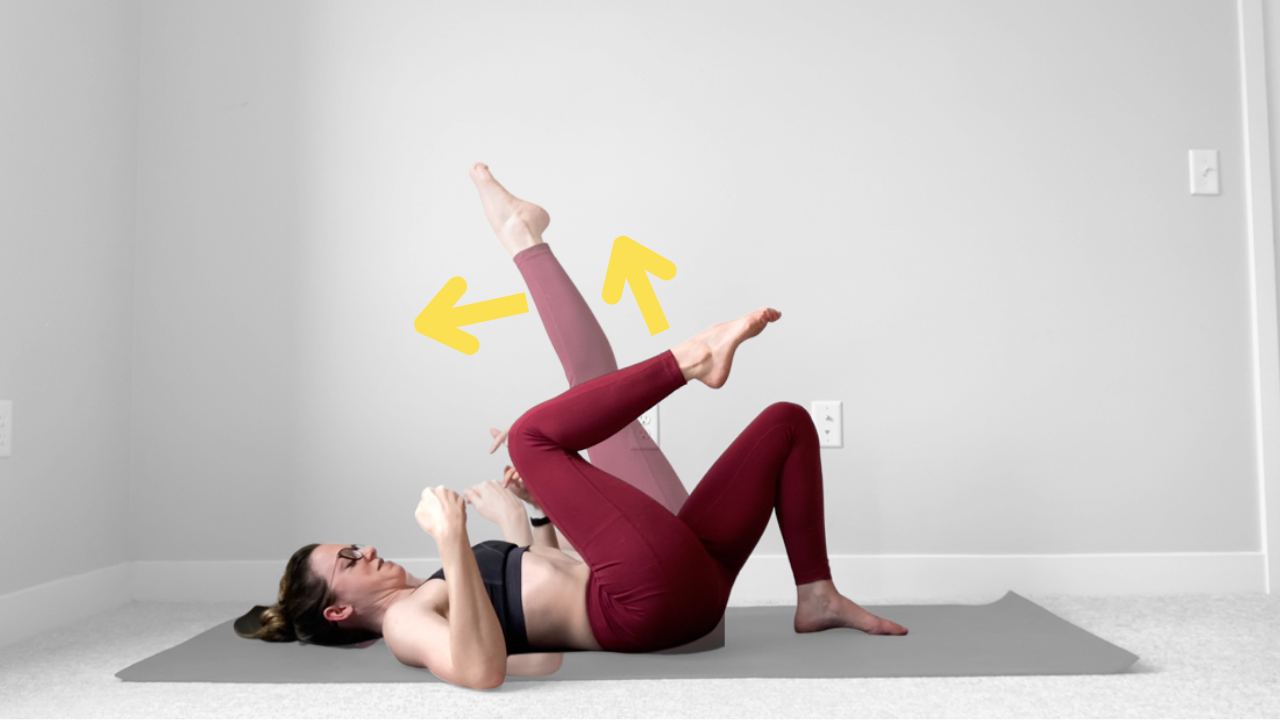
Tip #5: Take it To the Floor
Working on your hamstring stretches while lying down is another great way to disincentivize the back rounding. By keeping your back and sacrum on the floor, you can immediately feel if your hips start to lift to “cheat” the hamstring stretch.
Variations of drills like these can be helpful:


Related Content
Recommended Recorded Workshop
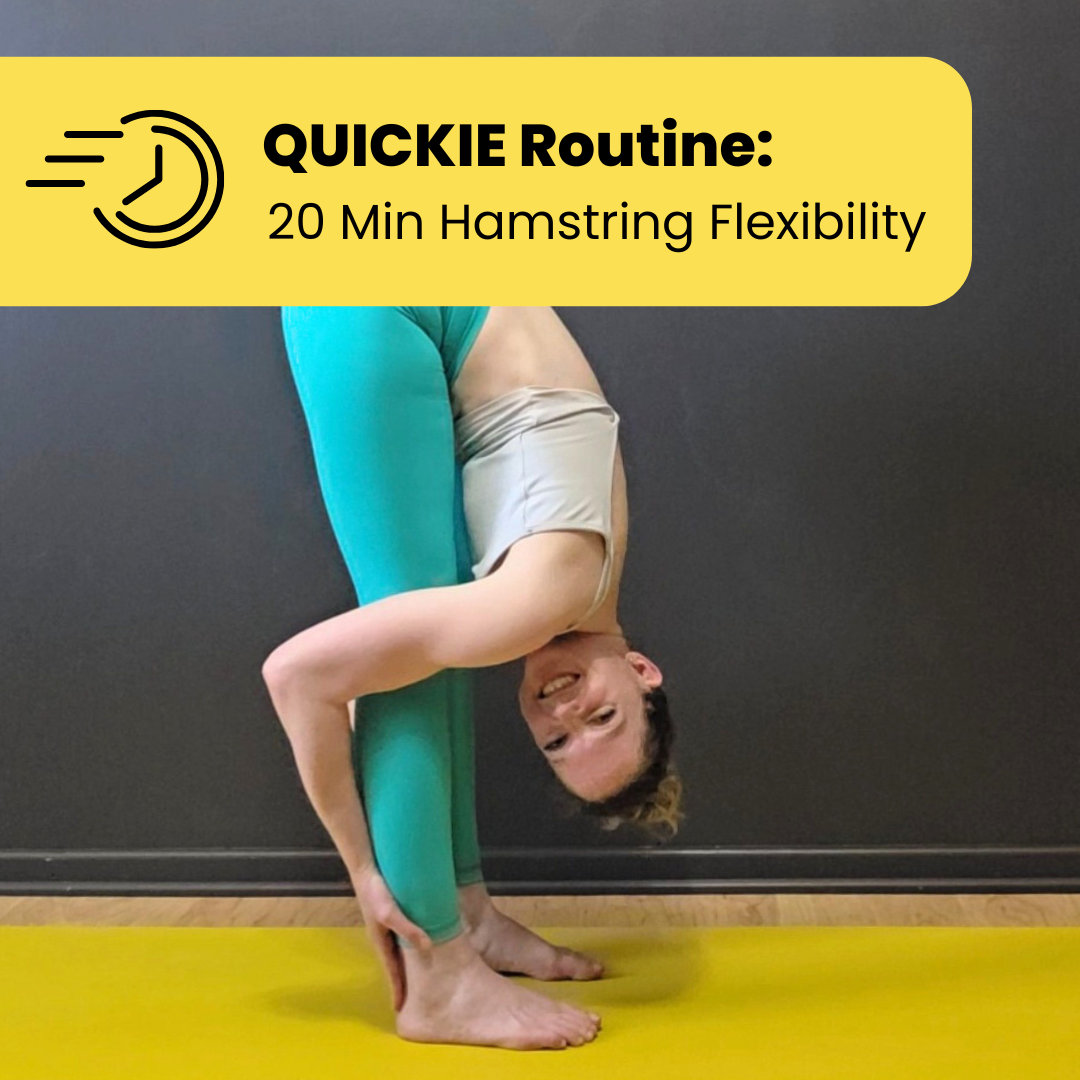
Who this routine is for:
This 20-30 minute training routine is targeted to students who want to work on their hamstring flexibility for deeper forward folds. Modifications of drills are given for all levels - whether you’re someone who’s working to finally be able to touch their toes, or whether you’re a more advanced student trying to get their belly all the way to their thighs in a forward fold, this workshop has drills for you!
What you get:
THIS IS NOT A FOLLOW-ALONG VIDEO like the majority of my other recordings. Instead, this is a written routine that includes detailed how-to videos for each drill, as well as educational content to help you maximize your progress in your hamstring-training journey.
This PDF includes:
Flexibility training best practices
Anatomical considerations for training hamstring flexibility
How to modify the drills to make them easier or harder as your flexibility progresses (spoiler alert: bending your knees is encouraged!)
How to test to see if you have nerve tension that will impact your training (and how to adjust accordingly)
Suggestions for training frequency
A program of drills with how-to videos explaining proper form, what sensations to look for, what muscles to engage (if needed), and how to modify to adjust the difficulty/intensity for each drill. The “default” routine is meant to fit a 20-minute training session
Additional recommended drills (along with how-to videos) for another 10 minutes of training for students who want to extend their practice to a 30-minute session
A printable all-on-one-page list of drills for quick reference
Heads up: Because each of the how-to videos is filmed as an educational video with comments on form, technique, and modifications - and not as a “follow along with me” style video, the videos will likely take longer to watch than to actually execute the exercise. So plan on your first run-through of this routine to take longer than 20 minutes because you’ll likely be watching the videos in their entirety which will take a bit longer (and then just skimming through them for reminders in the future).
Recommended props:
Yoga mat (knee padding is your friend!)
Some kind of long strap - can be stretchy or stiff
2 yoga blocks
A chair or bench (very helpful for folks with tight hips)